In this experiment I will connect a colour sensor to Android Things. The Colour sensor is a TCS34725, a red, green, blue and clear light sensing light-to-digital converter. I’ll connect the sensor to a Raspberry Pi 3 running Android Things preview image 1 and display the sensor readings on a Character LCD display.
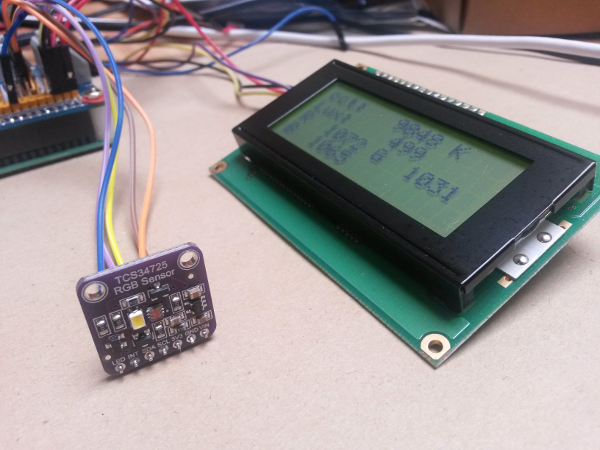
The TCS34725 module and LCD display
The Hardware
- Raspberry Pi 3 running Android Things preview image 1
- TCS34725 colour sensor module (available from Adafruit, et. al)
- 16×4 LCD module and LCM1602 (read about setting these up in previous posts)
- 3.3V to 5V level shifter for the I2C connection to the display

The experiment setup
The Software
Support for the sensor is included in the things-drivers library. In this example I’ll connect to it and display sensor readings. I’ll display Correlated Colour Temperature (CCT), along with Lux and the raw sensor data as shown below.
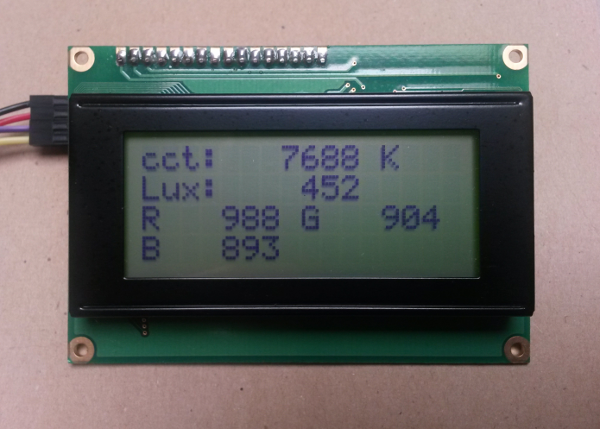
LCD display with sensor readings
Project Setup
I created a new Android Things project in Android Studio as described in the official documentation, and added the things-drivers library to my app by adding the following line to the dependencies section of my app’s build.gradle file.
compile 'nz.geek.android.things:things-drivers:1.2.0'
Using the Sensor
To connect to the sensor you need to create a ColourSensor using a ColourSensorBuilder. Use builder methods to specify which GPIO the LED control line of the colour sensor module is connected to, and who is interested in receiving updates from the sensor, i.e., implements the ColourSensor.Listener interface. For This experiment I’m implementing the interface in my MainActivity.
public class MainActivity extends Activity implements ColourSensor.Listener {
My implementation of the listener
@Override
public void onColourUpdated(int clear, int red, int green, int blue) {
  lcd.print(1, String.format(Locale.UK, "cct: %6d K", Colour.toColourTemperature(red, green, blue)));
  lcd.print(2, String.format(Locale.UK, "Lux: %6d", Colour.toLux(red, green, blue)));
  lcd.print(3, String.format(Locale.UK, "R %5d G %5d", red, green));
  lcd.print(4, String.format(Locale.UK, "B %5d", blue));
}
In onCreate of my MainActivity I create the lcd and colour sensor objects
@Override
protected void onCreate(Bundle savedInstanceState) {
  super.onCreate(savedInstanceState);
  createLcd();
  createColourSensor();
}
Here are my implementations of createLcd and createColourSensor
private void createLcd() {
  I2cSerialCharLcd.I2cSerialCharLcdBuilder builder = I2cSerialCharLcd.builder(LCD_WIDTH, LCD_HEIGHT);
  builder.rs(0).rw(1).e(2).bl(3).data(4, 5, 6, 7).address(7);
  lcd = builder.build();
  lcd.connect();
  lcd.enableBackLight(true);
}

private void createColourSensor() {
  ColourSensor.ColourSensorBuilder builder = ColourSensor.builder();
  colourSensor = builder.withLedGpio(LED_GPIO_NAME).withListener(this).build();
  colourSensor.enable(true);
}
The ColourSensor has other methods to control and configure the TCS34725: you can enable and disable the LED and enable and disable the sensor with enableLed() and enable() respectively. In future releases I will expose more functionality of the TCS34725 through the ColourSensor wrapper (depends on user demand/use cases). The underlying Tcs34725 class implements all of the settings described in the device data sheet, so you could bypass the ColourSensor and instantiate and manipulate a Tcs34725 object directly if you wished.
Finally, I clean up the I2C device usage in accordance with Android Things documentation, by calling close on the lcd and colourSensor objects.
@Override
public void onDestroy() {
  super.onDestroy();
  if (lcd != null) {
    lcd.disconnect();
  }
  if (colourSensor != null) {
    colourSensor.enable(false);
    colourSensor.close();
  }
}
Conclusion
In this experiment I have added a colour sensor to Android Things to determine the colour temperature of objects. Why would you want to do this? Maybe a compulsive need to sort the world’s skittles.