HD44780 LCD modules let you define up to 8 custom characters. This means you can create your own symbols to display.
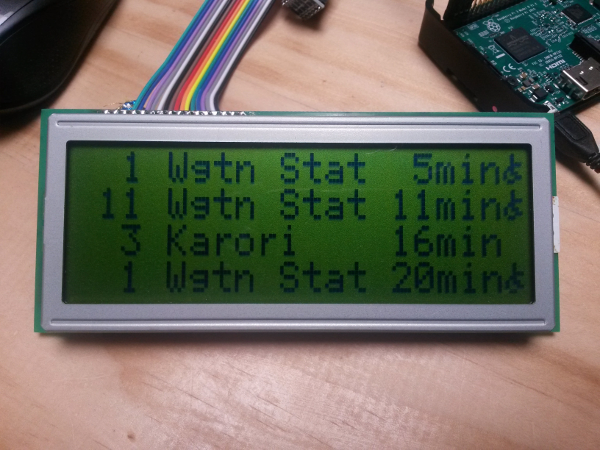
Some Wellington buses have wheelchair access. This is shown on the bus stop display as a wheelchair icon next to the arrival time. In the API this is a ‘vehicleFeature’ of ‘lowFloor.’ In the last post I created my own bus stop display. I want to show this icon on my display so I’ll need to define a custom character.
Creating a Custom Character
To create a custom icon you need to make a byte array of bitpatterns to load into CGRAM. I start with a piece of grid paper, draw a 5×7 rectangle on it and play around with pencil and eraser until it looks as good as you can get with a 5×7 box. You actually have 5×8 if you want to go slightly lower than other characters, the space where an underline would go. Working it out on graph paper makes it easy to figure out the hex value you will need for each row of the character.
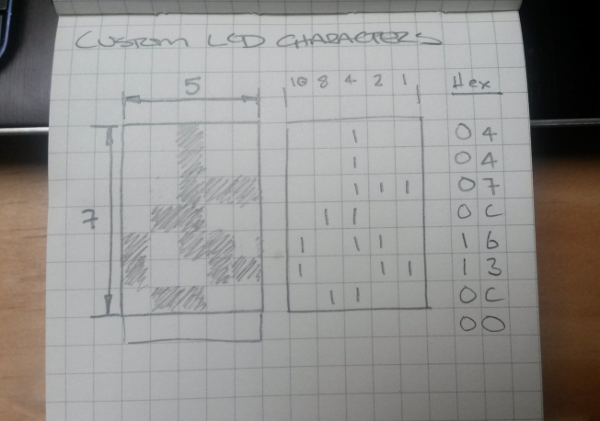
Magic with hex
Once you have the hex values you can create a byte array in your project.
![]()
Then write this to CGRAM, you have 8 addresses in CGRAM you can use 0 – 7. The first argument to setCgRam() is the GCRAM address to store the character, the second argument is the byte array. Any time after you have initialised the display with connect() you can call setCgRam() to initialise your symbol.
![]()
Now all you need to do is write the address to the display to display it. We need to write the address of the symbol, which is in the range 0 – 7, not the text ‘0’ to ‘7.’ To do this you need to escape it with a back slash. In my project I have a method return me the appropriate string which I append to the String that I pass to print().

The Result
The result is a custom character you can include in your messages on the display. I use this method to draw bargraphs onto displays. You can also get creative by placing symbols next to each other to create bigger symbols, but you are limited to the 8 characters that you have space for in CGRAM.