Welcome to the first part in a two part series about using an LCD Character display with Android Things. In this part we’ll collect, partially explain, and wire together the hardware. In the next part we’ll setup the project in Android Studio and write some clever messages to the display.
The Android things I2C API enables you to communicate with I2C devices, such as the PCF8574, using java in an Android project. The PCF8574 is a port expander that lets you connect to peripherals over a relatively high speed serial bus to a controller. This reduces the wire count and pin usage. Common usage includes interfaces to buttons, keypads and displays. We will use the PCF8574 to connect a Raspberry Pi to an LCD Character display.
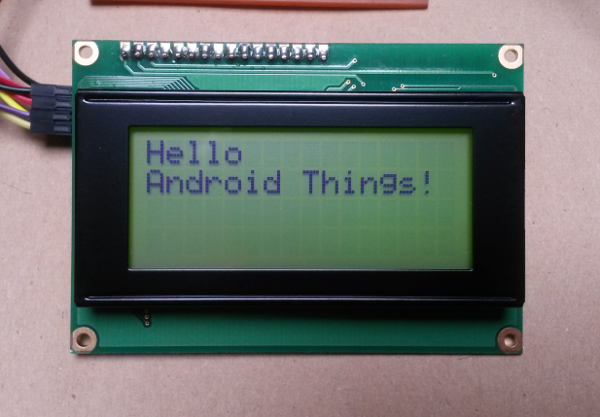
Character LCD driven by Android Things
Hardware Requirements
The setup
- Android Things device (I’m using a Raspberry Pi and Developer Preview 1)
- An LCD character display (I’m using a 16 x 4 LCD character display with backlight)
- An LM1602 module based on a PCF8574 (more about these later)
- A level shifter for connecting the Raspberry Pi’s 3.3v I2C bus the the module’s 5v bus
- Some hookup wires
- Snacks
Android Things API
The Android Things I2C API is well documented here. Take a few minutes to read the description there if you are unfamiliar with I2C. I will assume that, at this point, you know what I mean by SDA and SCL, master and slave, and slave addresses and registers.
The Android Things SDK is so new that the javadoc for the API is not published on the Android developer site. You can download the javadoc from here.
The Hardware
I2C Module (LCM1602-PCF8574)
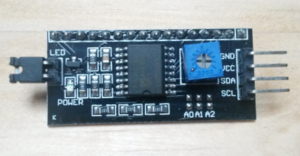
LCM1602 (clone)
I’m using a clone of an LCM1602 module that contains a PCF8574A. It is designed to connect to the (reasonably) standard 16 pin character LCD displays. There’s some more information about these modules here.
The PCF8574 module is designed to interface to LCD displays, its purpose is to reduce the number of pins you need to control the LCD and simplify wiring. It’s disadvantages are that it’s more complicated to program and generally slower than wiring the display directly from a controller (in this case a Raspberry Pi). I got my PCF8574 module from aliexpress. They will most likely be available from your favourite auction site or online component retailer.
LCD Display (HD44780)
16×4 LCD display
LCD displays come in a few sizes, 16×2 is common, meaning the display is 16 characters wide and 2 characters high. I have a few different sizes in my parts bit from 8×2 to 40×4. In this example I’m using a 16×4 display with LED back light. The deliberate spelling mistake serves two purposes; the display is only 16 characters wide, and some people will have difficulty pronouncing the ‘h’ anyway.
Level Shifter

Magic level shifter
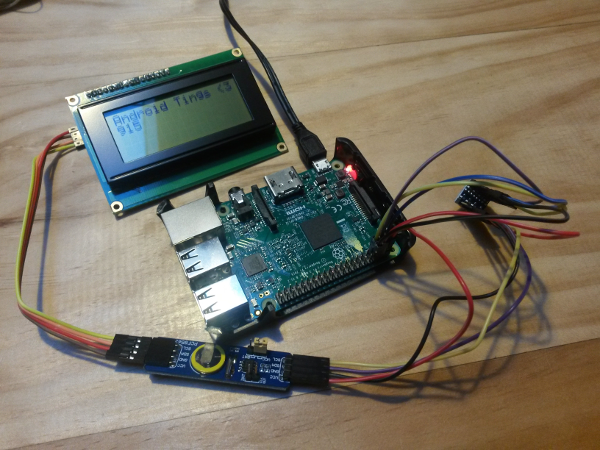
The Raspberry Pi IO pins are at 3.3V, the LCD module is 5V. The mismatch in voltages can cause problems. There is an official way to connect I2C busses of differing voltages that you can read about here. The short answer is to use a level shifter. You can usually get these from the same place you got your LCM1602 module. Sparkfun have a nice writeup about using them. The observant reader may notice that, in my photos, the level shifter is not hooked up. This is because I’m lazy and reckless, don’t follow my example, do the right thing and put in the level shifter.
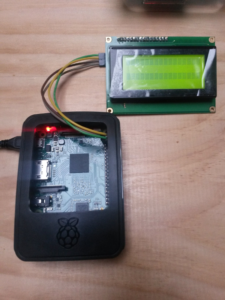
Connecting the Hardware
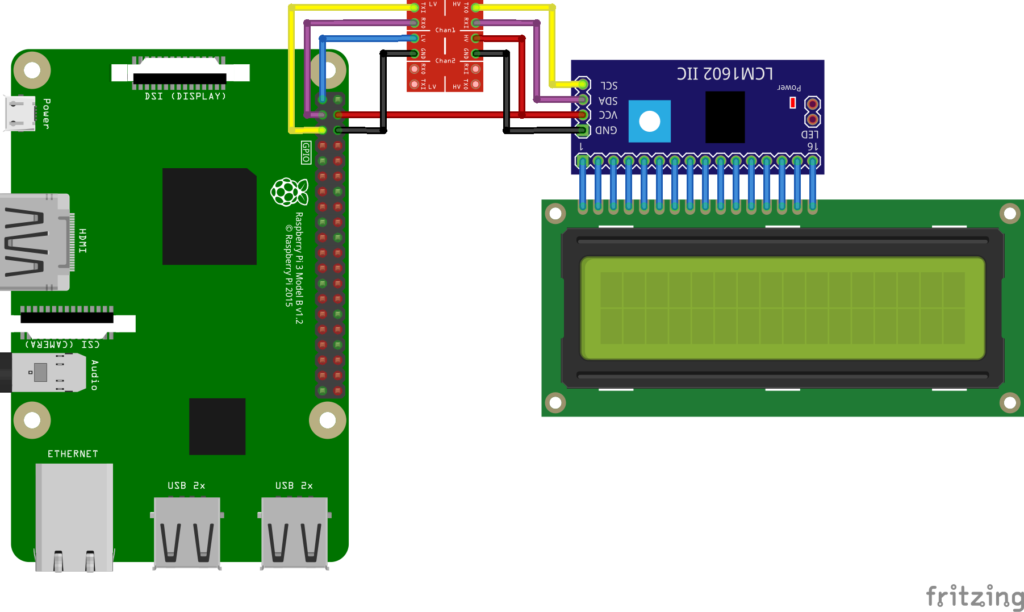
Connect up the modules as shown. We’re using 5v from the Raspberry Pi for this example. It can probably handle the current draw of the LCM1602 and display, but for a real device you might want a separate power supply (check the current ratings of your display).
Up Next
In the next part we’ll setup an Android things project in Android Studio, use the things-drivers library, and write clever messages to the display.
Resources
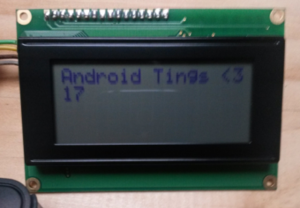
Update
After posting this part I got around to hooking up the level shifter (and an RTC). It works Igor!
hello. i am very interested in following your work and plan to attempt to recreate some of your projects in the new year.
how can i get e. g. email notifications as new articles are published? if you have Twitter i will follow you . i am @ronkjeffries there and in G+
i have two earlier RasPi so will purchase a new one that’s certified for Android Things.
i hope you will interface more I2C and SPI sensors. Temperature is a winner, motion detection is another.
please in general share specific source info. remember, newbies may not know how to buy something the way that you do.
be well. rjeffries@gmail.com
Hi, thanks for you comments. I’m too old for twitter 🙂 but I’ll keep G+ updated when I publish something, you should be able to get notifications from that community. I’ll try to include as many sensors as I can get that aren’t already supported and source information where I can, thanks for the suggestions.Good luck with your own adventures in Android Things and be sure to update the G+ community on your progress.
Cheers
Hi,
I have intel edison. This device work with librarys mraa and upm to facility use of the gpio, i2c.
How to I use mraa/upm in tel edison with android thingd SO?
Hi, I don’t have any experience with the Intel Edison or upm. Your best bet is to ask your question over on the Android Things G+ community.
There are a couple of references to MRAA on the Intel documentation site for Android Things, so MRAA – Android Things integration maybe an option in the near future.
https://software.intel.com/en-us/iot/android-things