Sometimes you need to read analog sensors in your IoT project. The values could be from light sensors, potentiometers, or other things that aren’t cool enough to get digital equivalents. The Raspberry Pi doesn’t have an Analog to Digital Converter (ADC) so you need to add one if you want to use analog sensors. In this experiment I’m going to add an ADC to the Raspberry Pi and use it from an Android Things project to measure analog values. The ADC I’ll use is the four channel, 8 bit PCF8591.
The Android Things PeripheralManager may get analog pins in future but for now it doesn’t, so I’m going to add the PCF8591 to the things-drivers library.
Two ADC channels
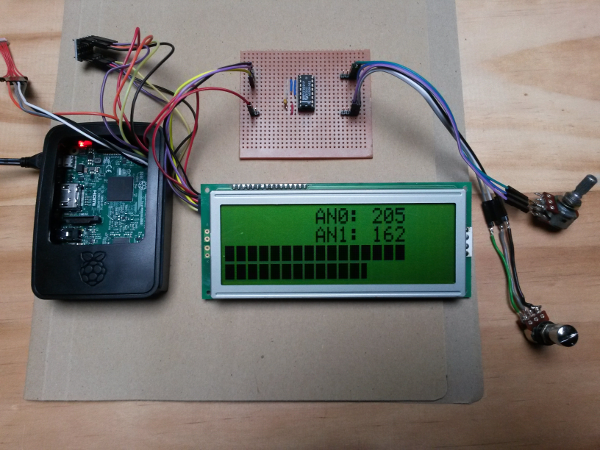
Hardware
- Raspberry Pi 3 running Android Things preview image.
- A PCF8591 on a breadboard or module like this.
- A display of some kind (I’m using an LCM1602 and character LCD).
- your trusty level shifter for connecting 3.3V Raspberry Pi I2C to 5V peripherals.
- something to measure (I’m using potentiometers).
Connecting the Hardware

Adding the Sensor
There are a few ways we can add the sensor; we could add it as a Sensor using the user-sensor extension like we did in this previous experiment, we could add it as a HID and feed values to the framework via events, or we could add it as a new type of thing, out of the framework. The simplest option is to add it as a new type of thing using the Android Things I2C driver API. This will do for an MVP, to demonstrate the concept. We can modify it later to add it in to the framework as a new sensor or HID if required.
Adding the Library
To use the things-drivers library containing the ADC driver, after you have set up a standard Android Things, add the following to the dependencies section of your app’s build.gradle
compile 'nz.geek.android.things:things-drivers:1.1.0'
Access the ADC by creating an I2cAdc using an I2cAdc.I2cAdcBuilder. Use the builder to specify the address of the PCF8591, its operating mode and the rate you want to read the ADC.
I2cAdc.I2cAdcBuilder builder = I2cAdc.builder();
adc = builder.address(0).fourSingleEnded().
          withConversionRate(100).build();
adc.startConversions();
The startConversions() method starts a thread to periodically read and cache values from the ADC. To read the latest value call readChannel() passing the channel you are interested in. The PCF8591 is a four channel ADC. The channels are numbered 0 to 3. The ADC is 8 bit so the returned value will be in the range 0-255. Scaling this value to a voltage depends on what you are using as VCC. In my setup it’s 5V. In my demo I’m just using the raw ADC value.
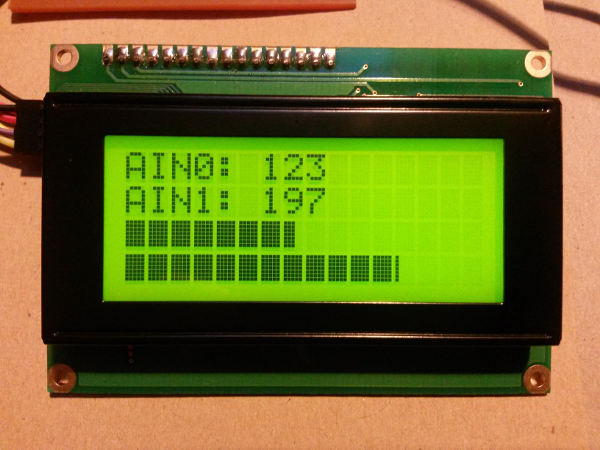
The Result
Here I have two potentiometers connected to the PCF8591. The LCD shows values from the two potentiometers on the first two lines. The second two lines are the same values as bargraphs.
The Code
The source code for the ADC example is here.
Hi,
The article is good.
How Android things is different from IOTivity alljoyn?
How to comapre these with Android things…any document on this will help.
Thanks,
Arun