Making things do stuff

Month: December 2016

How far away is that Android Thing?

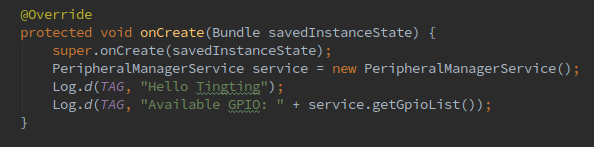
I want to add a new sensor type to Android Things using the user-space driver extension mechanism provided by the API. The new sensor type is ‘Distance’ and comes from a Laser Range Finder (LRF) connected via a UART. The goal for this project is to read data from the LRF over a UART, add ‘distance’ from the LRF as a new type of sensor, and display the distance on an LCD.

This task is about adding a new sensor type to Android Things. This is something you can’t do in Android (without modifying AOSP and building your own ROM) so I’m interested to see how the process goes.
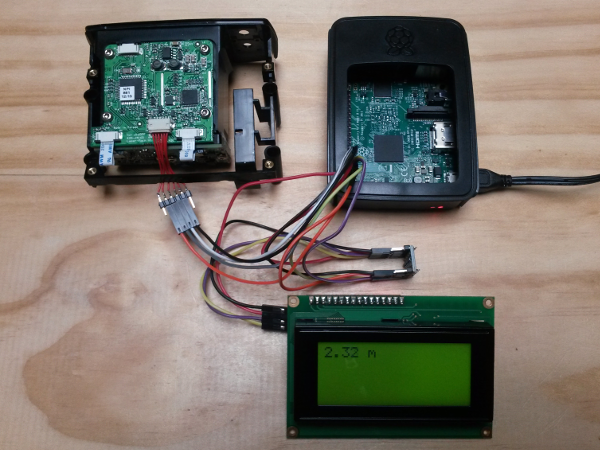
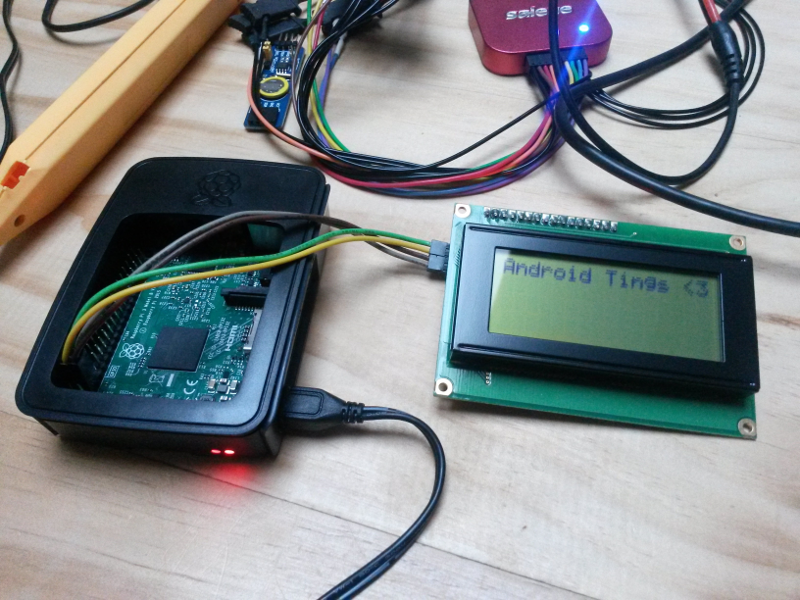
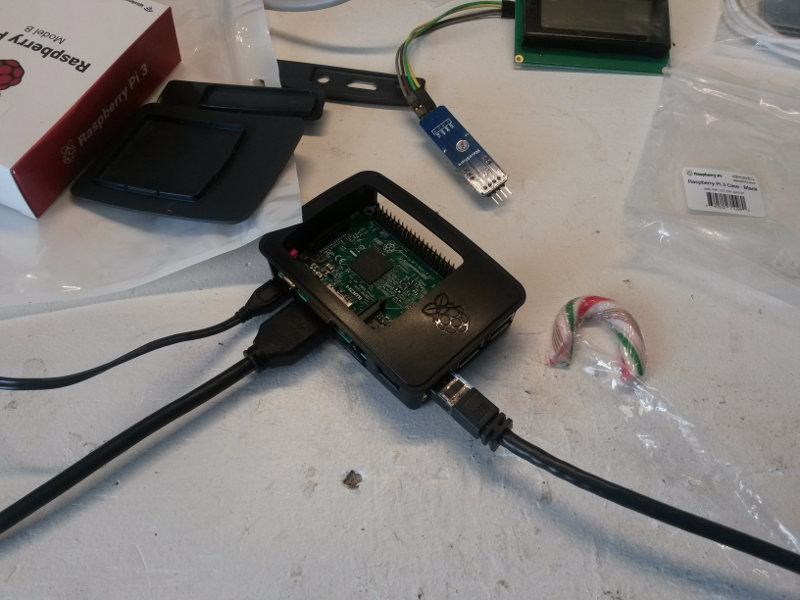
The Setup

The setup is similar to my previous experiments with the addition of a laser range finder.

  • Raspberry Pi 3 running Android Things preview image 1,
  • LCM1602 (clone),
  • character LCD,
  • level shifter for I2C,
  • laser range finder.

Disclaimer: I have access to this LRF because I work for the company that makes them. This is not something you can buy off the shelf.

Continue reading

Defining Custom Characters

HD44780 LCD modules let you define up to 8 custom characters. This means you can create your own symbols to display.

Some Wellington buses have wheelchair access. This is shown on the bus stop display as a wheelchair icon next to the arrival time.  In the API this is a ‘vehicleFeature’ of ‘lowFloor.’ In the last post I created my own bus stop display. I want to show this icon on my display so I’ll need to define a custom character.

Creating a Custom Character

To create a custom icon you need to make a byte array of bitpatterns to load into CGRAM. I start with a piece of grid paper, draw a 5×7 rectangle on it and play around with pencil and eraser until it looks as good as you can get with a 5×7 box. You actually have 5×8 if you want to go slightly lower than other characters, the space where an underline would go. Working it out on graph paper makes it easy to figure out the hex value you will need for each row of the character.

Magic with hex

Continue reading

Happy DevOps Day Android Things

It’s the day after the day after Christmas day, which is traditionally DevOps day here in Wellington. In a tradition that stretches back at least 30 seconds when I made it up, today is the day to sort out some of the build and deployment issues that you’re experiencing with the project you rushed to market without considering all the technical debt you accrued.

Continue reading

Where’s My Bus Android Thing?

One of the joys of Android development is that; whatever your idea, there is likely to be a library available to help you out. Most new projects begin with the addition of a few favourites.  If you are going to be consuming any web APIs then high on your list should be retrofit. In Android Things a few of the familiar Android APIs are not available. This may affect you if you are porting some existing Android code. It may also impact your choice of library and you’ll need to check that it doesn’t use a missing API.

In this example we’ll be continuing development on the LCD driver. We’ll be adding retrofit to ping the bus company for bus arrival times at a couple of local bus stops. It’s about time we got to the ‘Internet’ part of IoT 🙂

Here in Wellington some of our bus stops have live displays showing the times of the next few buses. Whenever I get the looser cruiser I check an app to see when I should leave the house,  which is like four or five clicks/swipes etc on my phone. Ain’t nobody got time for that. I need that information displayed in my house somewhere.


Two displays, one local stop each.

Continue reading

I2C with Android Things (Part 1)

Welcome to the first part in a two part series about using an LCD Character display with Android Things. In this part we’ll collect, partially explain, and wire together the hardware. In the next part we’ll setup the project in Android Studio and write some clever messages to the display.

The Android things I2C API enables you to communicate with I2C devices, such as the PCF8574, using java in an Android project. The PCF8574 is a port expander that lets you connect to peripherals over a relatively high speed serial bus to a controller. This reduces the wire count and pin usage. Common usage includes interfaces to buttons, keypads and displays. We will use the PCF8574 to connect a Raspberry Pi to an LCD Character display.


Character LCD driven by Android Things

Continue reading

Android Tings <3

Android Things PCF8574 and HD44780

The next step is to get some sort of display onto the Android Things Raspberry Pi. I have a drawer full of LCD modules, based on the HD44780, that I have used before with the PCF8574 I2C IO port expander.

The Android Things preview image has java support for I2cDevice. Writing a driver for the PCF8574 was a matter of porting some code from my old AVR library.

Code to follow…

Hello Ting ting

Task

Get Android Things running on the Raspberry Pi and run a hello world app from Android Studio.

Step 1 – Find a Raspberry Pi

Where are all my bloody Raspberry Pi’s? Oh yeah, One’s running Kodi, one’s a NAS, one’s … OK then, off to PBTech for a new Raspberry Pi. One quick trip into town the weekend before Christmas, no problem (Yay motorcycle ownership).

Step 2 – write the Image to SD card

The PBTech Raspberry Pi kit comes with an SD card, power supply, case and Raspberry Pi 3. Writing the SD card is the usual ‘dd’ affair.  Get the image and follow these instructions.

Step 3 – Connect it up

OK, USB for power. Can I use USB for adb too, nope on the Raspberry Pi it’s power only. OK, following instructions, “Connect to Ethernet.” Where’s that 30 meter Ethernet cable that reaches to the router.

Step 4 – Hello world app

Following instructions again. A single Activity that lists GPIOs will do for a start.

Result: Hello World on Raspberry Pi with Android Tings (Things) preview image.

Complexity: one third candy cane.

© 2025 android.geek.nz

Theme by Anders NorenUp ↑